See a typo? Have a suggestion? Edit this page on Github
Up until this year, my Bitcoin custody strategy was fairly straightforward, and likely familiar to other hodlers:
- Buy a hardware wallet
- Put the seed phrase on steel plates
- Secure those steel plates somewhere on my property
But in October of last year, the situation changed. I live in Northern Israel, close to the Lebanese border. The past 14 months have involved a lot of rocket attacks, including destruction of multiple buildings in my home town. This brought into question how to properly secure my sats. Importantly, I needed to balance two competing goals:
- Resiliency of the saved secrets against destruction. In other words: make sure I didn't lose access to the wallet.
- Security against attackers trying to steal those secrets. In other words: make sure no one else got access to the wallet.
I put some time into designing a solution to these conflicting goals, and would like to share some thoughts for others looking to improve their BTC custody strategy. And if anyone has any recommendations for improvements, I'm all ears!
Goals
- Self custody I didn't want to rely on an external custody company. Not your keys, not your coins.
- Full access I always maintain full access to my funds, without relying on any external party.
- Computer hack resilient If my computer systems are hacked, I will not lose access to or control of my funds (neither stolen nor lost).
- Physical destruction resilient If my hardware device and steel plates are both destroyed (as well as anything else physically located in my home town), I can still recovery my funds.
- Will survive me If I'm killed, I want my wife, children, or other family members to be able to recover and inherit my BTC.
Multisig
The heart of this protection mechanism is a multisig wallet. Unfortunately, interfaces for setting up multisig wallets are tricky. I'll walk through the basics and then come back to how to set it up.
The concept of a multisig is that your wallet is protected by multiple signers. Each signer can be any "normal" wallet, e.g. a software or hardware wallet. You choose a number of signers and a threshold of signers required to perform a transaction.
For example, a 2 of 2 multisig would mean that 2 wallets can sign transactions, and both of them need to sign to make a valid transaction. A 3 of 5 would mean 5 total signers, any 3 of them being needed to sign a transaction.
For my setup, I set up a 2 of 3 multisig, with the 3 signers being a software wallet, a hardware wallet, and SLIP39 wallet. Let's go through each of those, explain how they work, and then see how the solution addresses the goals.
Software wallet
I set up a software wallet and saved the seed phrase in a dedicated password manager account using Bitwarden. Bitwarden offers an emergency access feature, which essentially means a trusted person can be listed as an emergency contact and can recover your account. The process includes a waiting period, during which the account owner can reject the request.
Put another way: Bitwarden is offering a cryptographically secure, third party hosted, fully managed, user friendly dead-man switch. Exactly what I needed.
I added a select group of trusted people as the recoverers on the account. Otherwise, I keep the account securely locked down in Bitwarden and can use it for signing when necessary.
Let's see how this stacks up against the goals:
- Self custody Check, no reliance on anyone else
- Full access Check, I have access to the wallet at all times
- Computer hack resilient Fail, if my system is hacked, I lose control of the wallet
- Physical destruction resilient Check, Bitwarden lives beyond my machines
- Will survive me Check thanks to the dead-man switch
Hardware wallet
Not much to say about the hardware wallet setup that I haven't said already. Let's do the goals:
- Self custody Check, no reliance on anyone else
- Full access Check, I have access to the wallet at all times
- Computer hack resilient Check, the private keys never leave the hardware device
- Physical destruction resilient Fail, the wallet and plates could easily be destroyed, and the plates could easily be stolen. (The wallet could be stolen too, but thanks to the PIN mechanism would theoretically be resistant to compromise. But that's not a theory I'd want to bet my wealth on.)
- Will survive me Check, anyone can take my plates and recover the wallet
SLIP39
This one requires a bit of explanation. SLIP39 is a not-so-common standard for taking some data and splitting it up into a number of shards. You can define the threshold of shards necessary to reconstruct the original secret. This uses an algorithm called Shamir's Secret Sharing. (And yes, it is very similar in function to multisig, but implemented differently).
The idea here is that this wallet is controlled by a group of friends and family members. Without getting into my actual setup, I could choose 7 very trusted individuals from all over the world and tell them that, should I contact them and ask for them, they should send me their shards so I can reconstruct that third wallet. And to be especially morbid, they also know the identity of some backup people in the event of my death.
In any event, the idea is that if enough of these people agree to, they can reconstruct the third wallet. The assumption is that these are all trustworthy people. But even with trustworthy people, (1) I could be wrong about how trustworthy they are, or (2) they could be coerced or tricked. So let's see how these security mechanism stands up:
- Self custody Fail, I'm totally reliant on others.
- Full access Fail, by design I don't keep this wallet myself, so I must rely on others.
- Computer hack resilient Check, the holders of these shards keep them in secure, offline storage.
- Physical destruction resilient Check (sort of), since the probability of all copies being destroyed or stolen is negligible.
- Will survive me Check, by design
Comparison against goals
We saw how each individual wallet stacked up against the goals. How about all of them together? Well, there are certainly some theoretical ways I could lose the funds, e.g. my hardware wallet and plates are destroyed and a majority of shard holders for the SLIP39 lost their shards. However, if you look through the check/fail lists, every category has at least two checks. Meaning: on all dimensions, if some catastrophe happens, at least two of the wallets should survive.
Now the caveats (I seem to like that word). I did a lot of research on this, and this is at least tangential to my actual field of expertise. But I'm not a dedicated security researcher, and can't really claim full, deep understanding of all these topics. So if I made any mistakes here, please let me know.
How-to guide
OK, so how do you actually get a system like this running? I'll give you my own step-by-step guide. Best case scenario for all this: download all the websites and programs mentioned onto a fresh Linux system install, disconnect the internet, run the programs and copy down any data as needed, and then wipe the system again. (Or, alternatively, do all the actions from a Live USB session.)
- Set up the SLIP39. You can use an online generator. Choose the number of bits of entropy (IMO 128bit is sufficient), choose the total shares and threshold, and then copy down the phrases.
- Generate the software wallet. You can use a sister site to the SLIP39 generator. Choose either 12 or 24 words, and write those words down. On a different, internet-connected computer, you can save those words into a Bitwarden account, and set it up with appropriate emergency access.
- Open up Electrum. (Other wallets, like Sparrow, probably work for this too, but I've only done it with Electrum.) The rest of this section will include a step-by-step guide through the Electrum steps. And yes, I took these screenshots on a Mac, but for a real setup use a Linux machine.
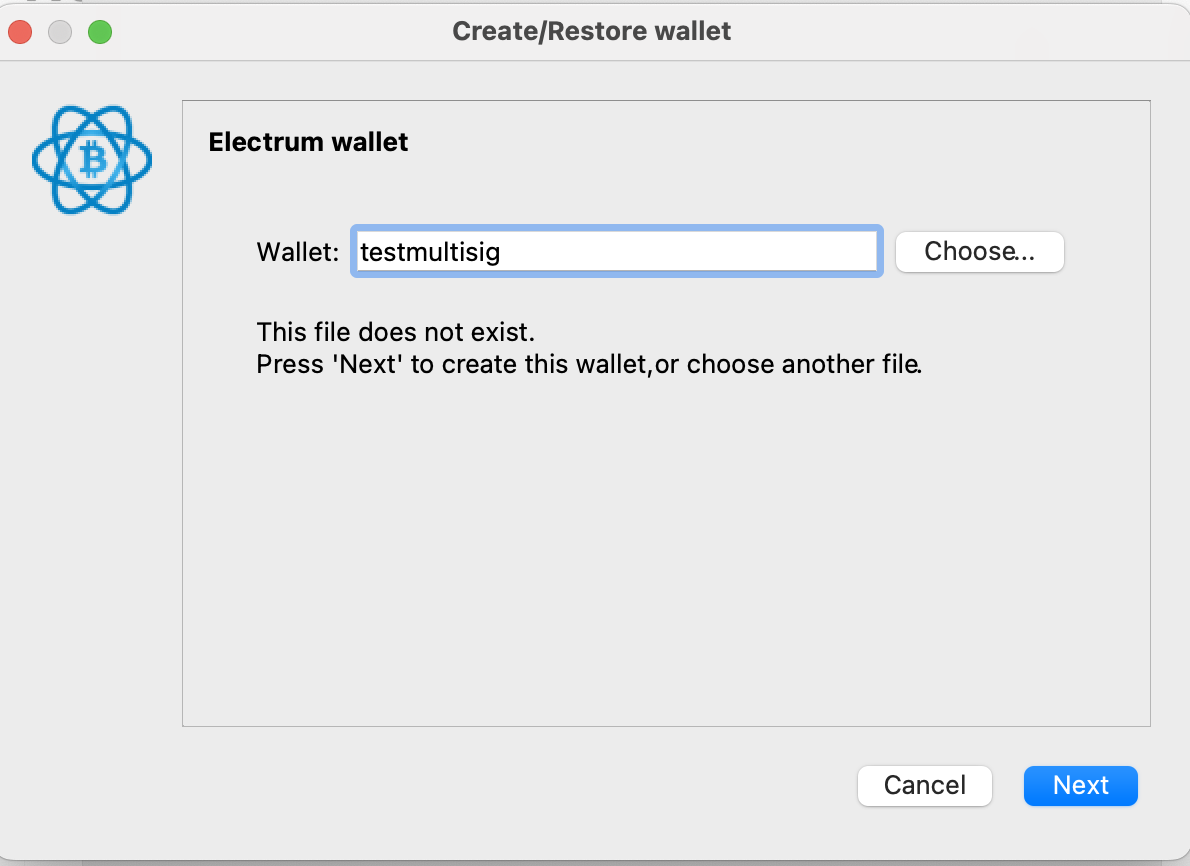
Set up a new wallet. Enter a name (doesn't matter what) and click next.
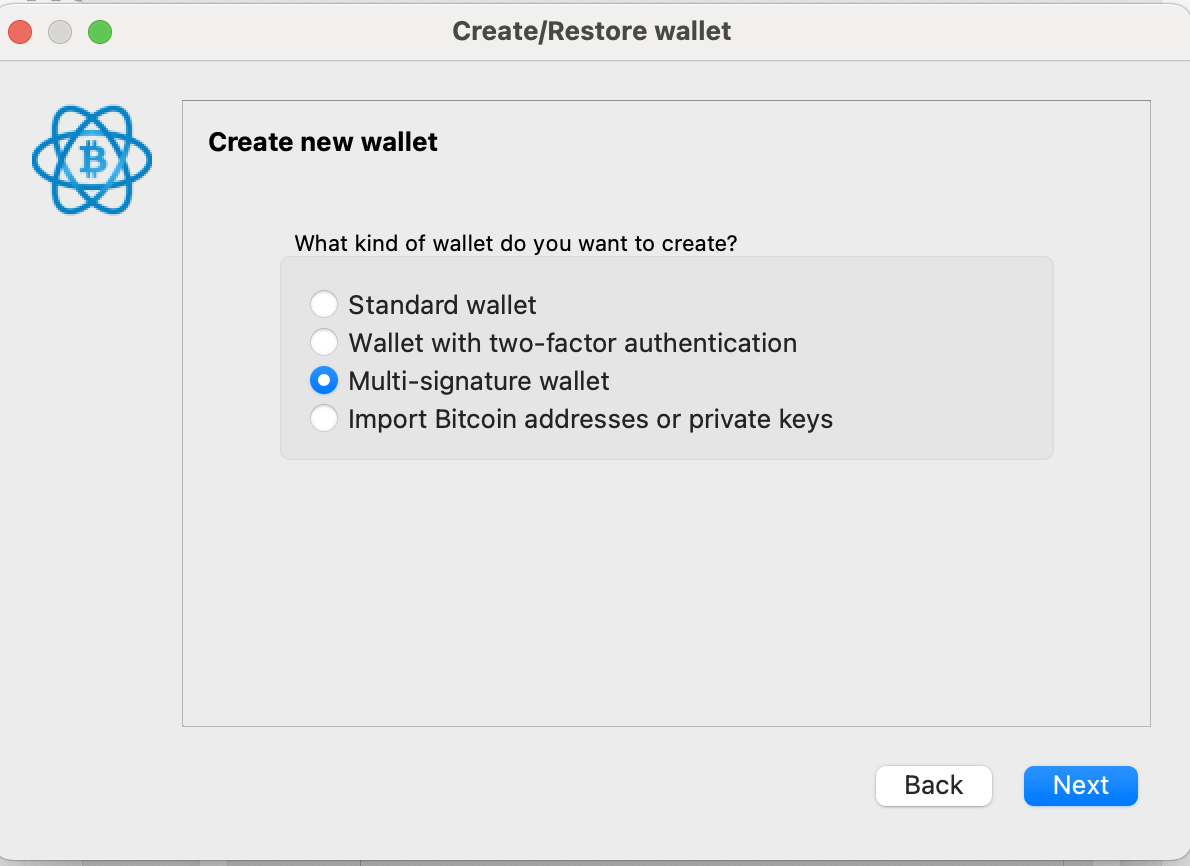
Choose a multisig wallet and click next.
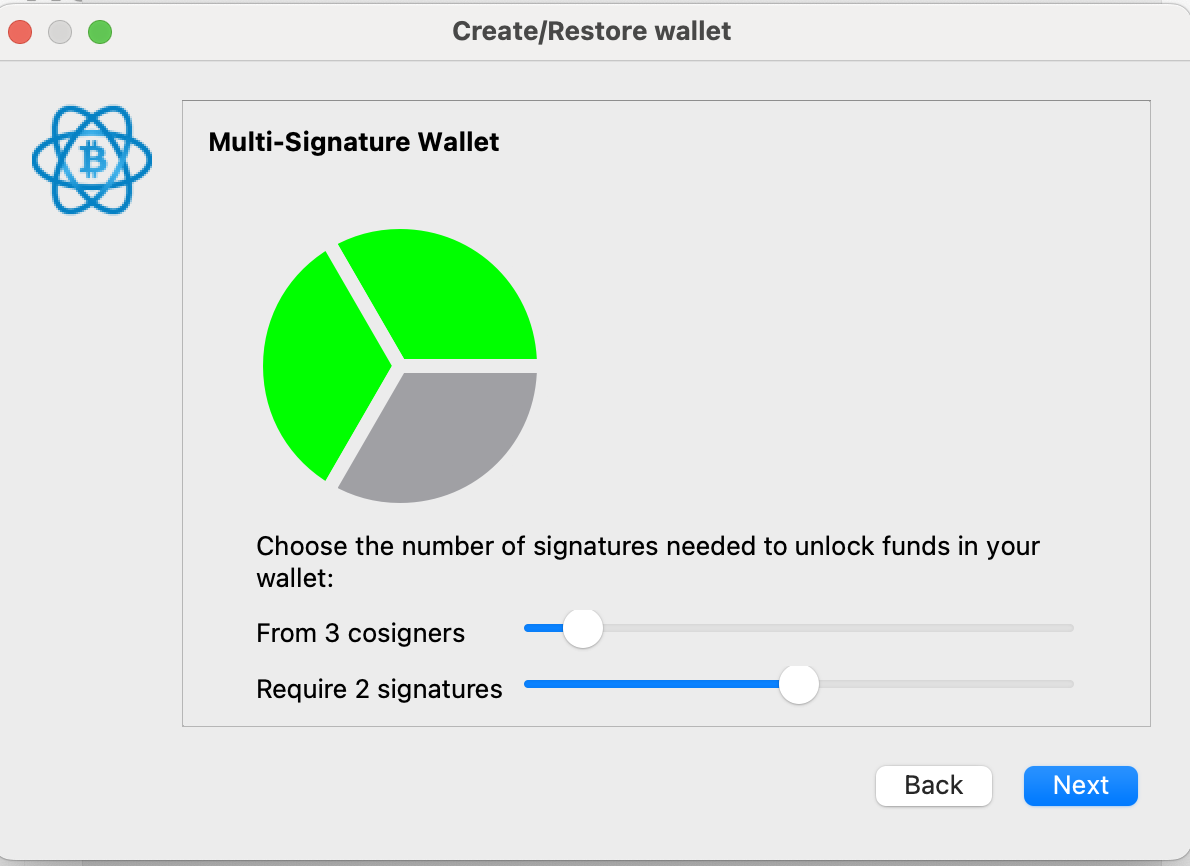
Choose 3 cosigners and require 2 signatures.
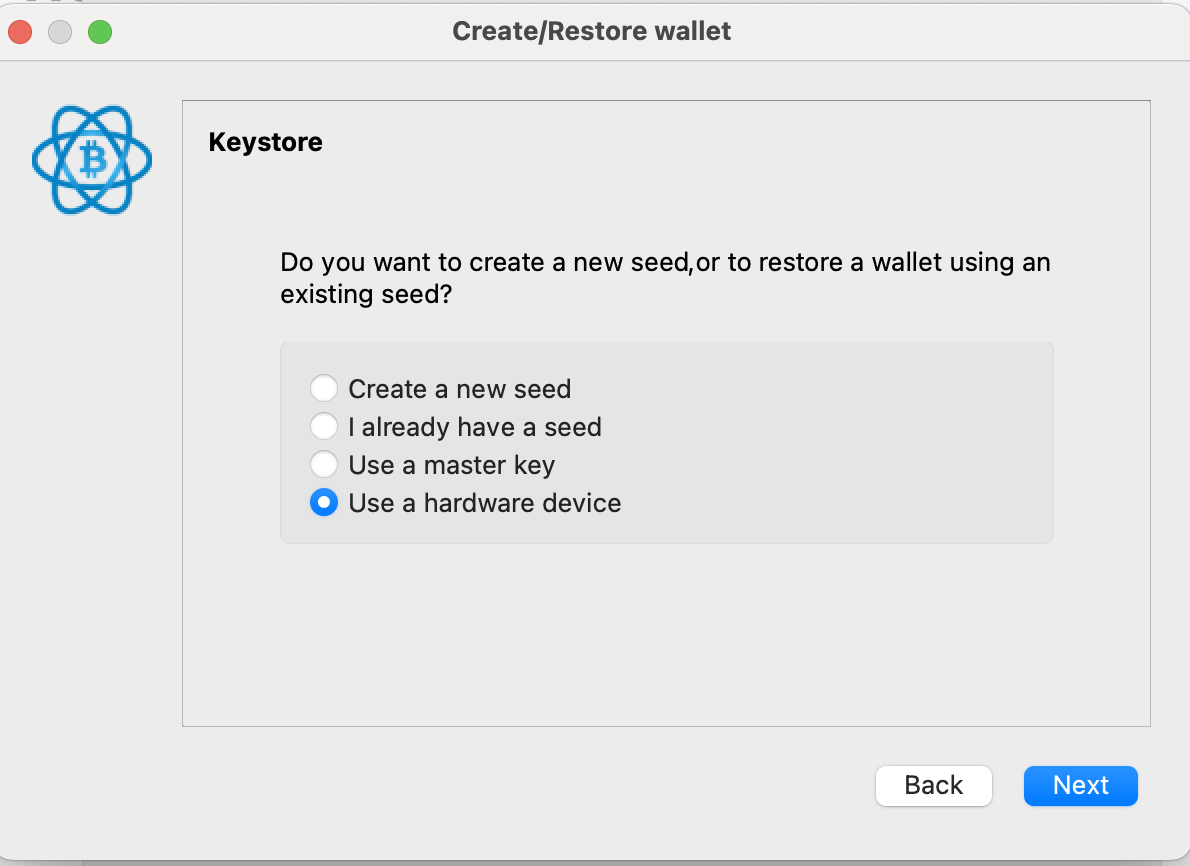
Now we're going to enter all three wallets. The first one will be your hardware device. Click next, then follow all the prompts to set it up.
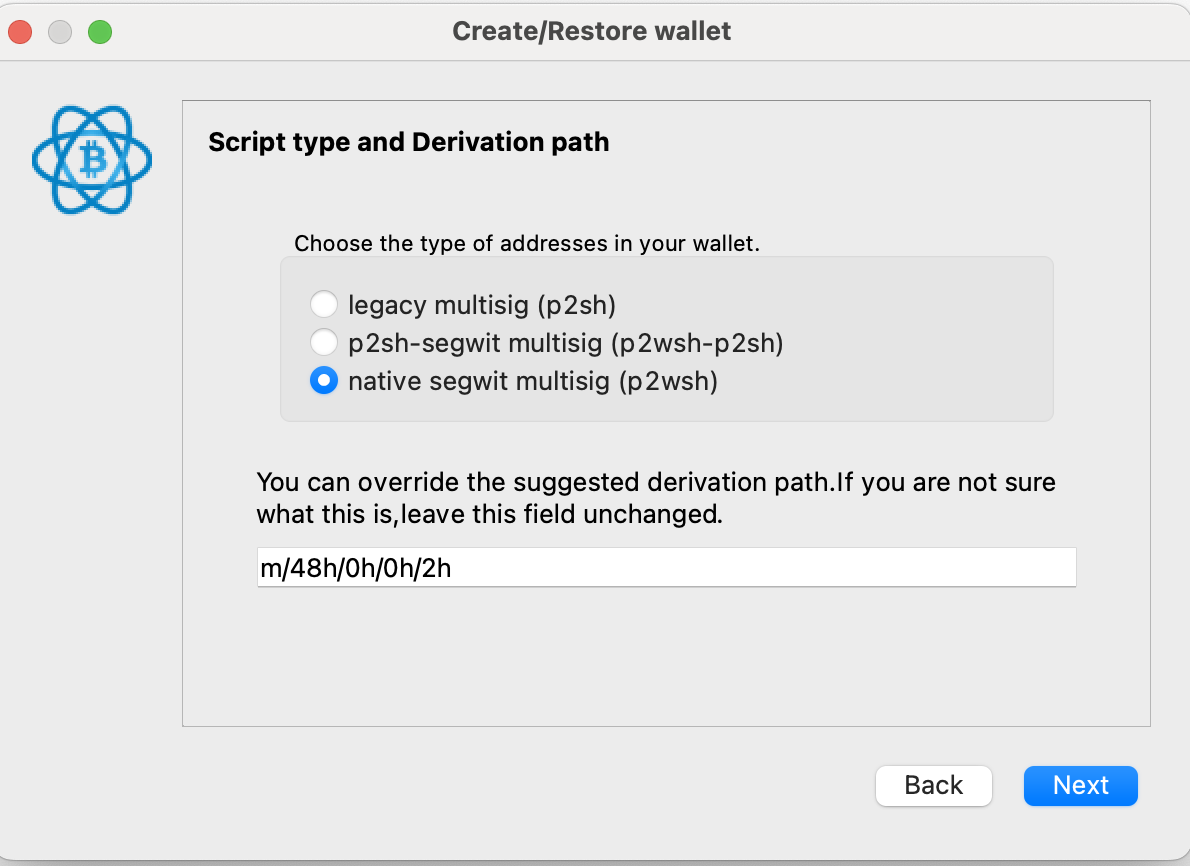
After a few screens (they'll be different based on your choice of hardware device), you'll be prompted to select a derivation path. Use native segwit and the standard derivation path.
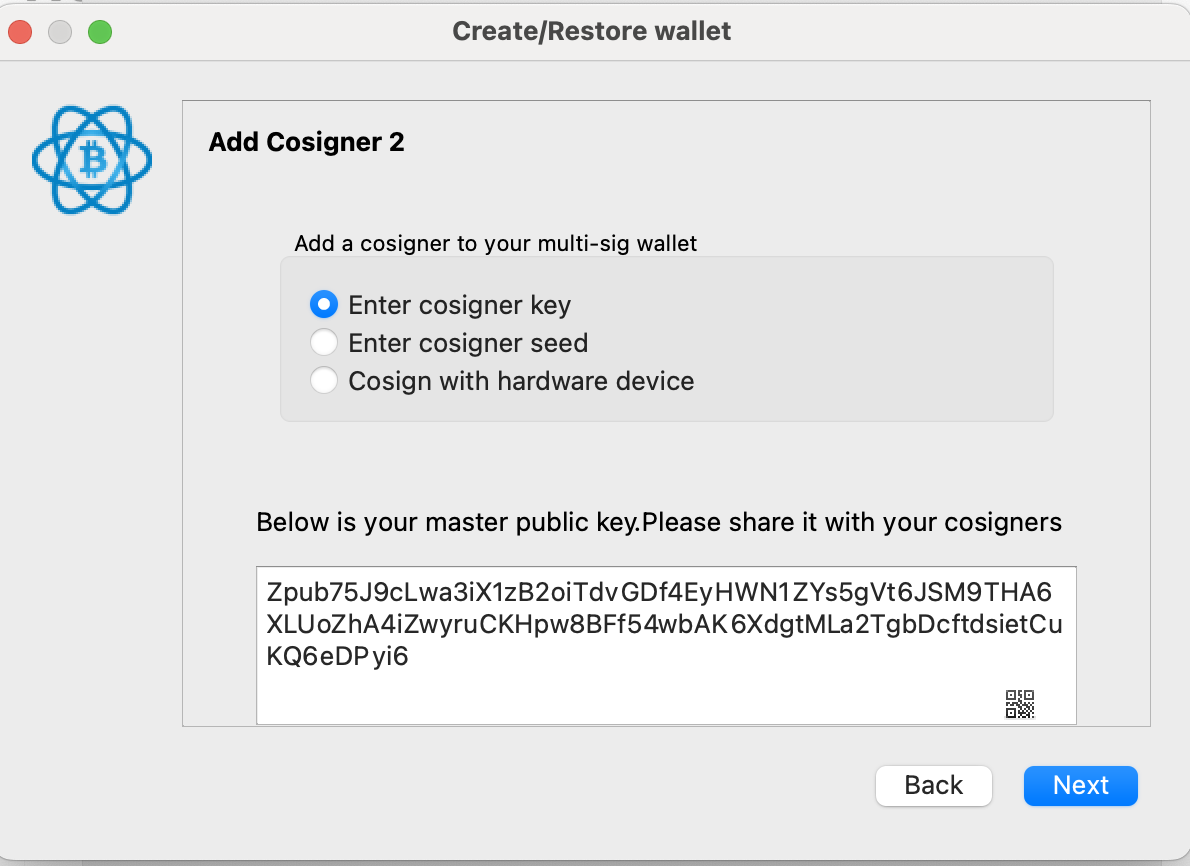
This next screen was the single most complicated for me, simply because the terms were unclear. First, you'll see a Zpub string displayed as a "master public key," e.g.:
Zpub75J9cLwa3iX1zB2oiTdvGDf4EyHWN1ZYs5gVt6JSM9THA6XLUoZhA4iZwyruCKHpw8BFf54wbAK6XdgtMLa2TgbDcftdsietCuKQ6eDPyi6
You need to write this down. It's the same as an xpub, but for multisig wallets. This represents all the possible public keys for your hardware wallet. Putting together the three Zpub values will allow your software of choice to generate all the receiving and change addresses for your new wallet. You'll need all three, so don't lose them! But on their own, they cannot be used to access your funds. Therefore, treat them with "medium" security. Backing up in Bitwarden with your software wallet is a good idea, and potentially simply sending to some friends to back up just in case.
And that explanation brings us back to the three choices on the screen. You can choose to either enter a cosigner key, a cosigner seed, or use another hardware wallet. The difference between key and seed is that the former is public information only, whereas the latter is full signing power. Often, multisig wallets are set up by multiple different people, and so instead of sharing the seed with each other (a major security violation), they each generate a seed phrase and only share the key with each other.
However, given that you're setting up the wallet with access to all seed phrases, and you're doing it on an airgapped device, it's safe to enter the seed phrases directly. And I'd recommend it, to avoid the risk of generating the wrong master key from a seed. So go ahead and choose "enter cosigner seed" and click next.
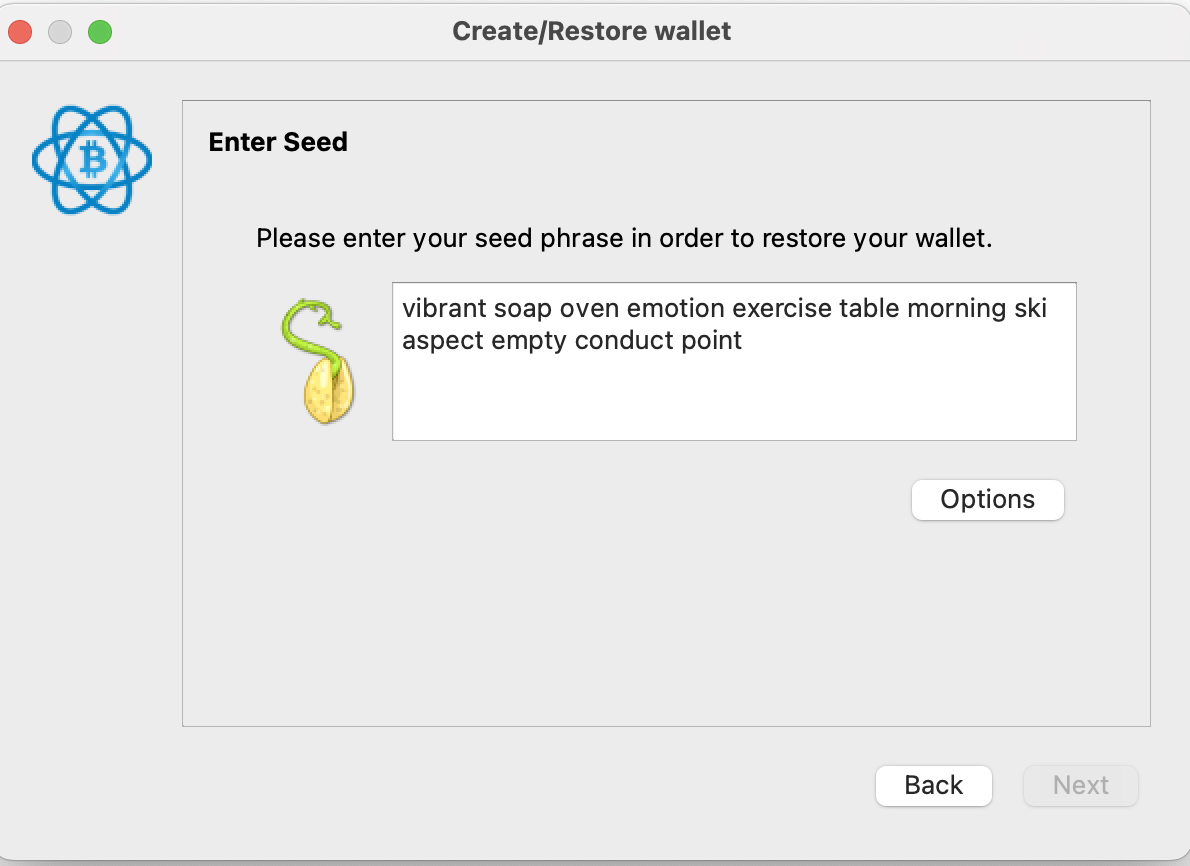
And now onto the second most confusing screen. I copied my seed phrase into this text box, but it won't let me continue!
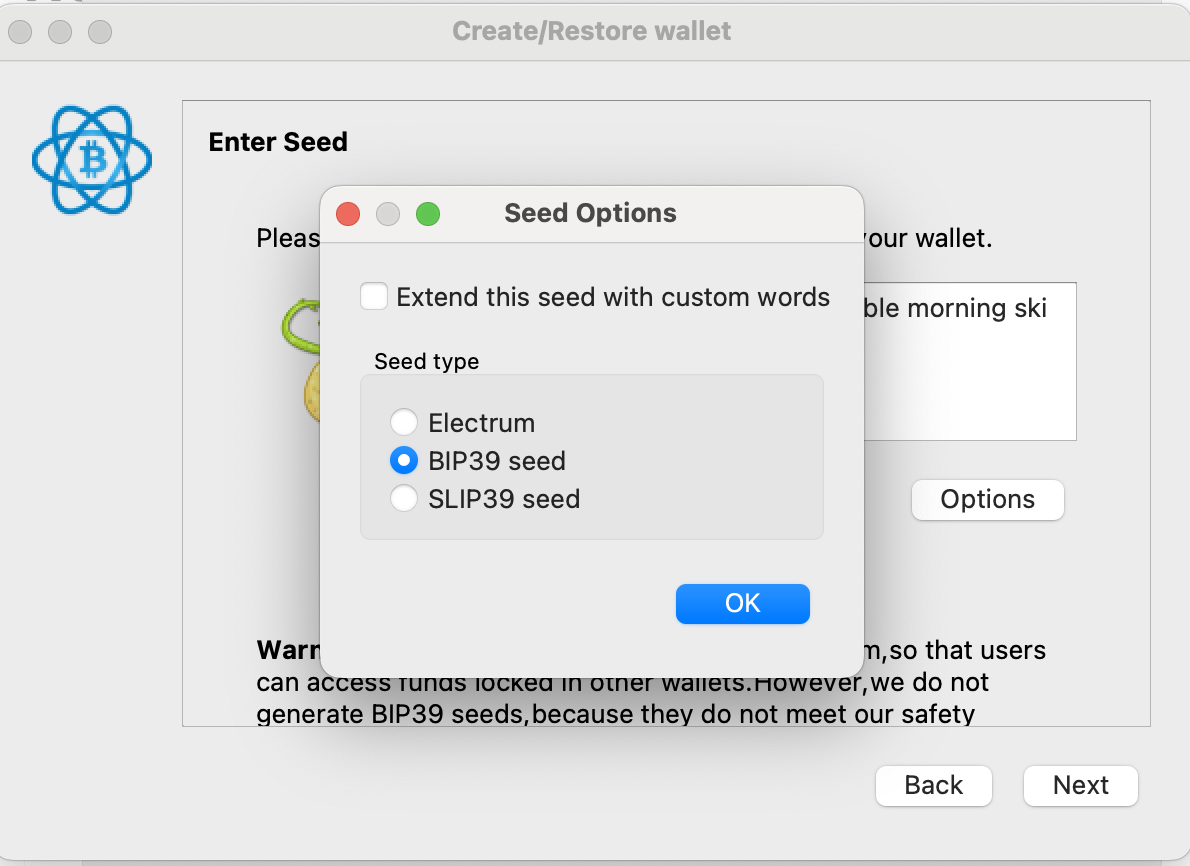
The trick is that Electrum, by default, uses its own concept of seed phrases. You need to click on "Options" and then choose BIP39, and then enter your seed phrase.
Continue through the other screens until you're able to enter the final seed. This time, instead of choosing BIP39, choose SLIP39. You'll need to enter enough of the SLIP39 shards to meet the threshold.
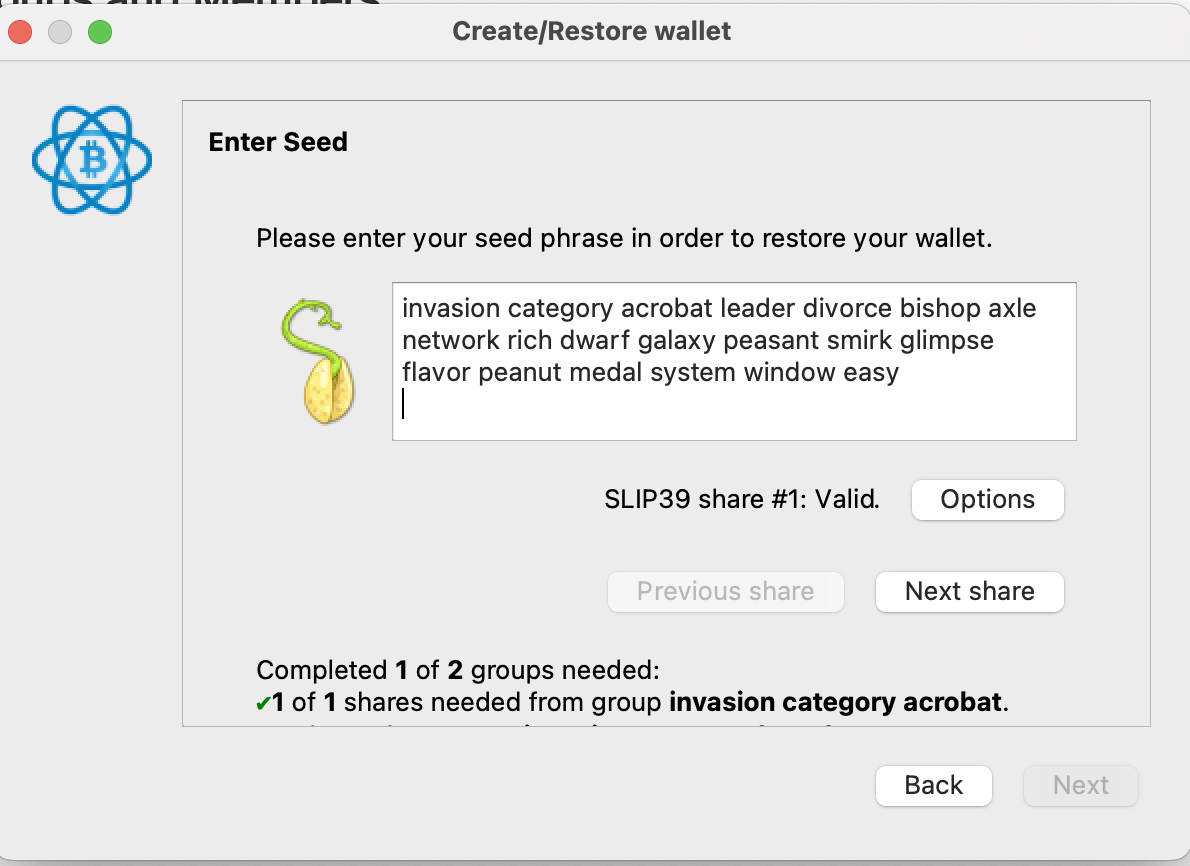
And with that, you can continue through the rest of the screens, and you'll now have a fully operational multisig!
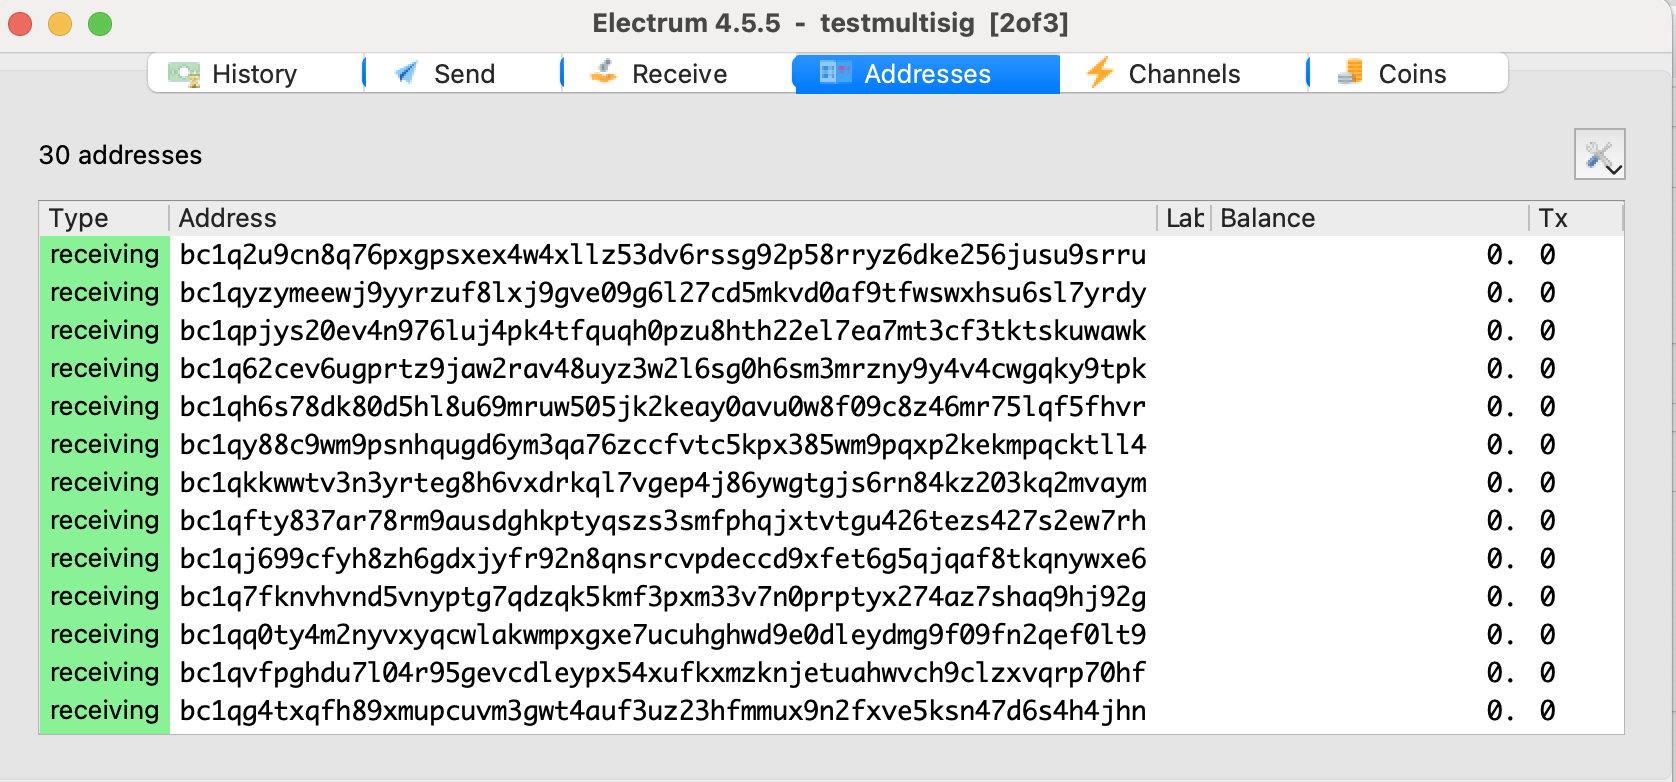
Open up Electrum again on an internet-connected computer. This time, connect the hardware wallet as before, enter the BIP39 as before, but for the SLIP39, enter the master key instead of the SLIP39 seed phrase. This will ensure that no internet connected device ever has both the software wallet and SLIP39 at the same time. You should confirm that the addresses on the airgapped machine match the addresses on the internet connected device.
If so, you're ready for the final test. Send a small amount of funds into the first receiving address, and then use Electrum on the internet connected device to (1) confirm in the history that it arrived and (2) send it back to another address. You should be asked to sign with your hardware wallet.
If you made it this far, congratulations! You're the proud owner of a new 2of3 multisig wallet.
Conclusion
I hope the topic of death and war wasn't too terribly morbid for others. But these are important topics to address in our world of self custody. I hope others found this useful. And once again, if anyone has recommendations for improvements to this setup, please do let me know!